MISP Feed Integration#
These instructions are for connecting the PrecisionSec MISP Feed to your existing MISP Threat Sharing Platform installation. Use the following instructions to connect the feed to your MISP instance.
Attention
Credentials are required to access this data. If you have not yet received evaluation credentials, please request access.
Log in to your MISP instance
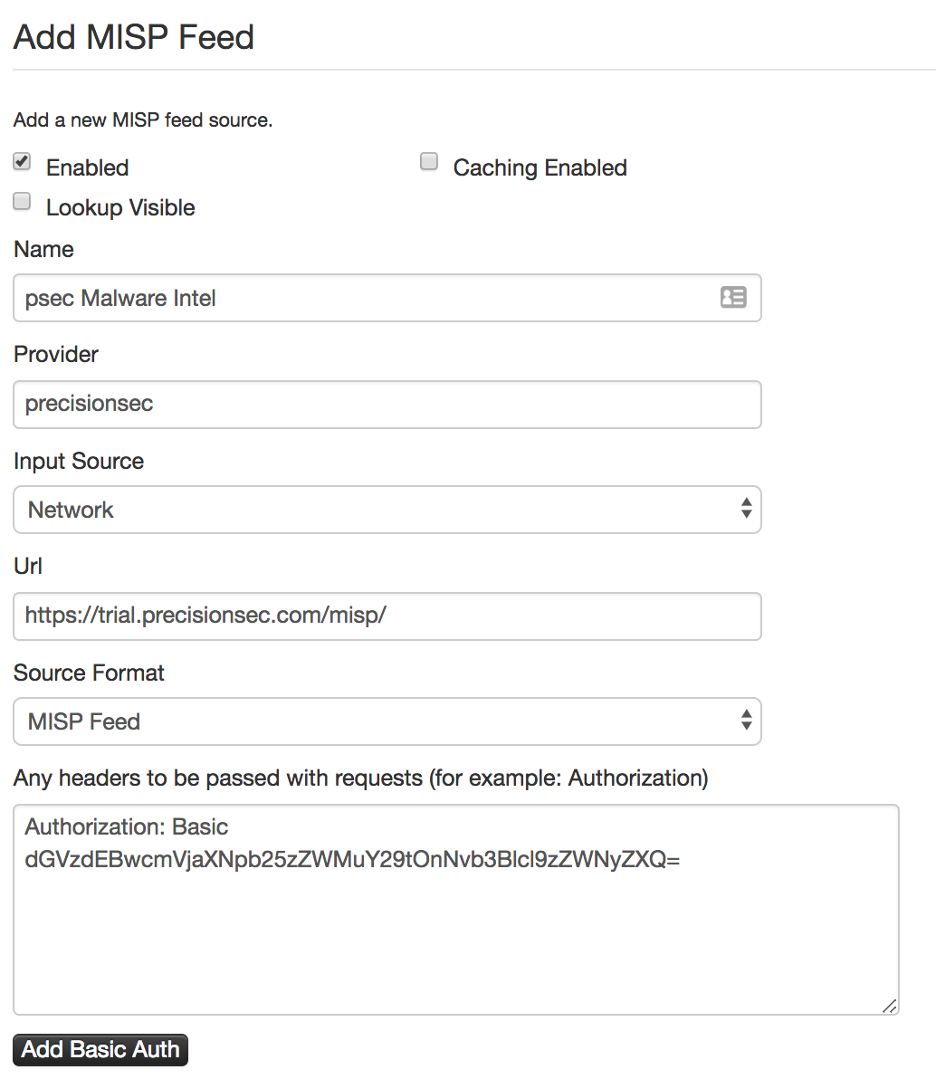
Navigate to Sync Actions > List Feeds and click Add Feed in the left sidebar to reach the Add MISP Feed page
Click the “Enabled” check box
In the “Name” field type “psec Malware Intel” or a name of your choosing
In the “Provider” field type “PrecisionSec”
Leave the “Input Source” as default “Network”
Enter the MISP feed URL in the “Url” box:
https://trial.precisionsec.com/misp/Do not attempt to visit the above URL directly, you will receive a 403 Forbidden error, which is expected
Leave the “Source Format” as default “MISP Feed”
Leave the “Any headers…” text box blank
Click the black “Add Basic Auth” button
Enter the credentials you were provided in the Username and Password fields that appear
Click “Add basic auth header” (an Authorization: Basic header should appear in the text box above)
You can leave the “Distribution” and “Default Tag” fields as default or set them as appropriate to your organization
Click the blue “Add” button
You will be returned to the “Feeds” page. If you click the “Enabled Feeds” tab you should now see the feed in the list.
You can explore the events remotely by clicking the magnifying glass under the Actions column, or you can Fetch the feed by clicking the circle icon with the down arrow.
You should now be able to explore the feed remotely or fetch the entire feed.