FortiGate Next Generation Firewall (NGFW) Integration#
Below you will find a general guide on how to connect a FortiGate firewall to an external blocklist. Please ensure to adjust the steps based on your specific FortiGate model and the current firmware version. This information is based on the documentation from the Fortinet website here: https://docs.fortinet.com/document/fortigate/7.4.0/administration-guide/891236/ip-address-threat-feed
Attention
Credentials are required to access this data. If you have not yet received trial credentials, please request access.
Log into the FortiGate Web Interface
Open your web browser and enter the IP address of your FortiGate firewall admin interface. Log in using your administrator credentials.
Go to the ‘Security Fabric’ Section
On the left-hand sidebar, click on ‘Security Fabric’. In the sub-menu that opens, click on ‘External Connectors’ and then click ‘Create New’.
Create a New External Blocklist
Scroll to the bottom of the ‘New External Connector’ page to the ‘Threat Feeds’ section and click the type of blocklist you would like to add. For the first example below, select ‘IP Address’.
Enter the Details for the IP Blocklist
Name: Give the blocklist a unique name, such as “PrecisionSec Malicious IP Addresses”
Use the default ‘Update method’ of ‘External Feed’
URI of External Resource: Enter the following:
https://trial.precisionsec.com/ip/ips180day.txtToggle the ‘HTTP Basic Auth’ switch to On
Enter the username and password you were provided
Refresh Rate: Choose how often the FortiGate checks the source for updates (in minutes). PrecisionSec recommends setting this to 60 minutes
Click ‘OK’
Ensure the toggle on the new card is enabled
See below for an example of the dialog for a new External Connecter with the type IP Address:

Enter the Details for the Domain Blocklist
Name: Give the blocklist a unique name, such as “PrecisionSec Malicious Domains”
Use the default ‘Update method’ of ‘External Feed’
URI of External Resource: Enter the following:
https://trial.precisionsec.com/domain/domains180day.txtToggle the ‘HTTP Basic Auth’ switch to On
Enter the username and password you were provided
Refresh Rate: Choose how often the FortiGate checks the source for updates (in minutes). PrecisionSec recommends setting this to 60 minutes
Click ‘OK’
Ensure the toggle on the new card is enabled
Enter the Details for the Malware Hash Blocklist
Name: Give the blocklist a unique name, such as “PrecisionSec Malware Hashes”
Use the default ‘Update method’ of ‘External Feed’
URI of External Resource: Enter the following:
https://trial.precisionsec.com/hash/sha256_180day.txtToggle the ‘HTTP Basic Auth’ switch to On
Enter the username and password you were provided
Refresh Rate: Choose how often the FortiGate checks the source for updates (in minutes). PrecisionSec recommends setting this to 60 minutes
Click ‘OK’
Ensure the toggle on the new card is enabled
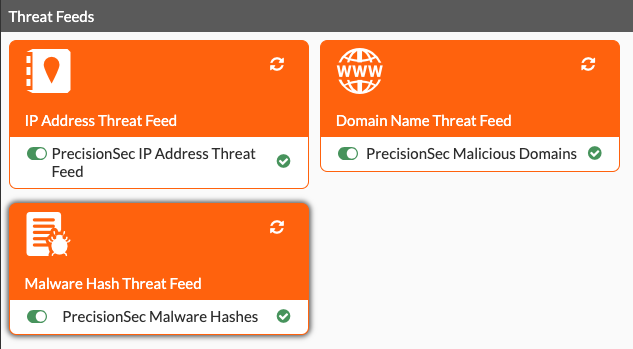
Once all of the feeds have been added, you should see something similar to the following on the ‘External Connectors’ page:
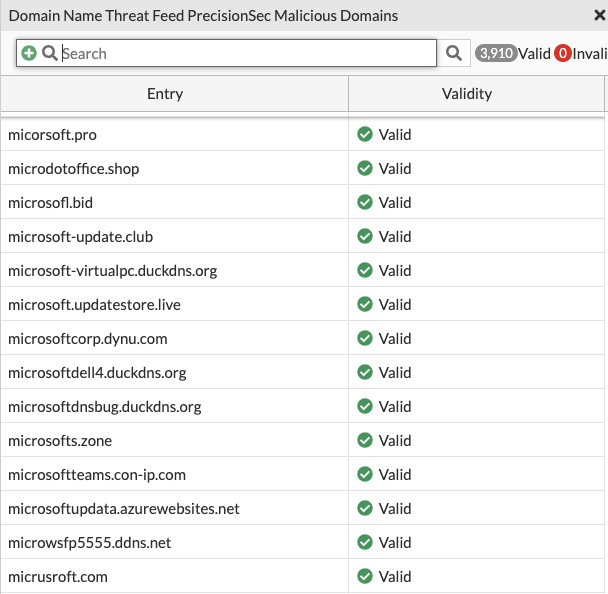
You can now view the entries in the various feeds if you mouse over one of the cards and click ‘View Entries’: